This PowerPoint (or PPT) tutorial shows you how to create equally-sized triangles inside the octagon. When we say “the octagon,” we simply mean an eight-sided shape object in PPT. Nothing special. Once we finish, these triangles will form an octagon.
For the purpose of this lesson, we are working on a Windows PC with PowerPoint version 2308, from the Microsoft 365 collection. In addition, we may use the right mouse button throughout this lesson. However, it should be fairly simple to follow along on another system.
Quick steps glance of triangles inside the octagon
Although we think this is a fairly quick tutorial, we plan to go step-by-step in this process. Below are the steps we plan to use to perform this task.
The quick steps
- Create a pie chart of eight categories
- Convert pie chart to a vector-based object via copy/paste method
- Ungroup vector-based object into separate pieces
- Adjust rounded edges to straight edges
So, we think we have the quick steps in order. Now, all we have to do is get busy with the design.
Steps to create the octagon with triangles
Follow the detailed steps below to create the octagon with triangles.
Step 1: Create a pie chart of eight categories
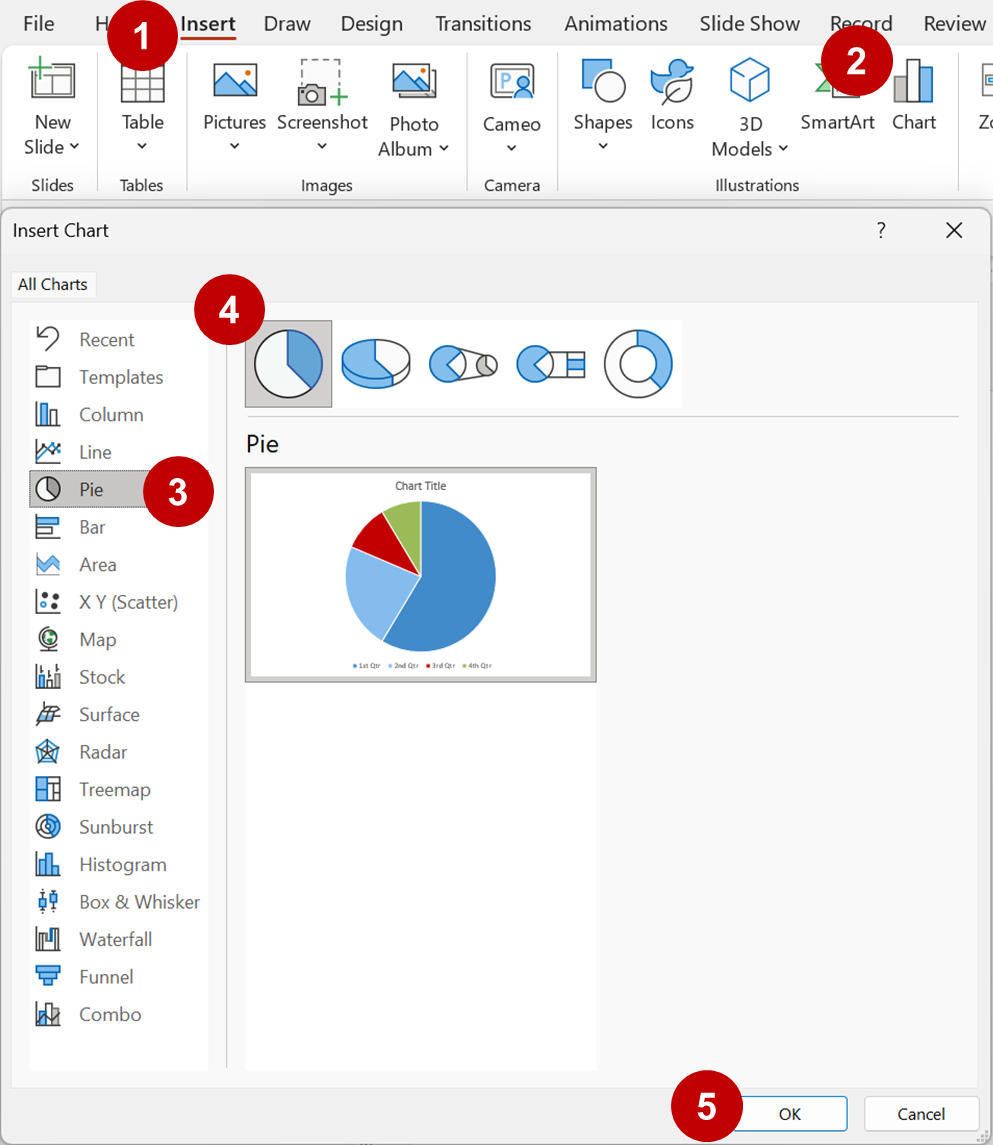
- From the PPT menu, click Insert. This will display the Insert ribbon.
- Under the Insert ribbon, click Chart from the Illustrations group. Note: This may appear differently on your system. After that, the Insert Chart dialog box appears.
- Select Pie from the left sidebar.
- Then, click on the 2D pie chart icon. This should be the first icon at the top.
- Click OK.
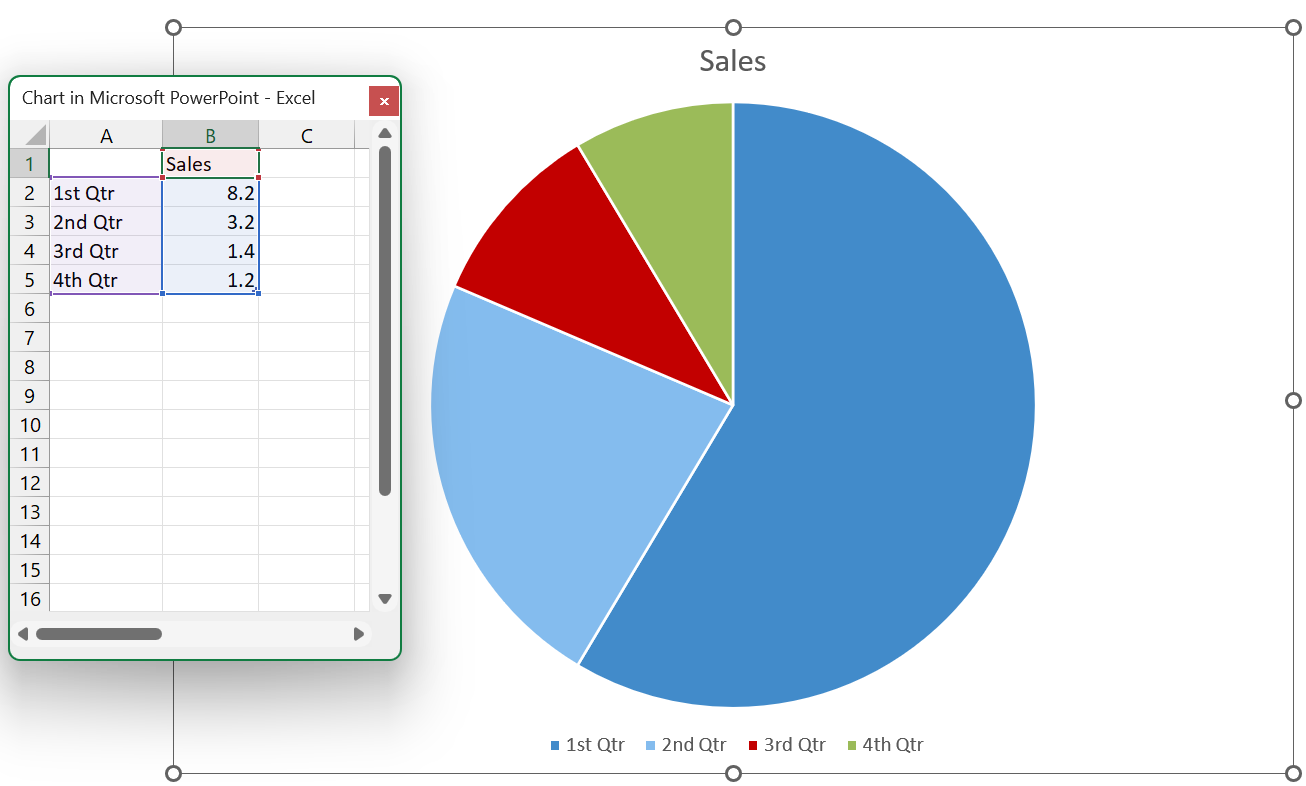
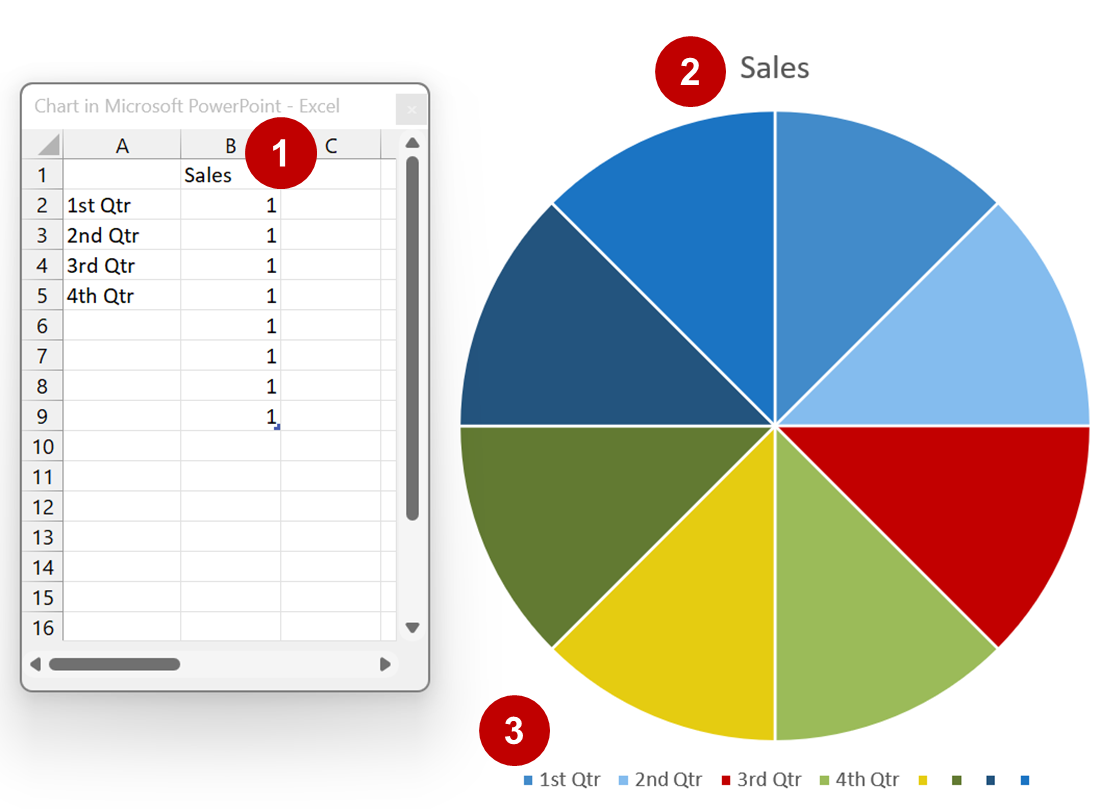
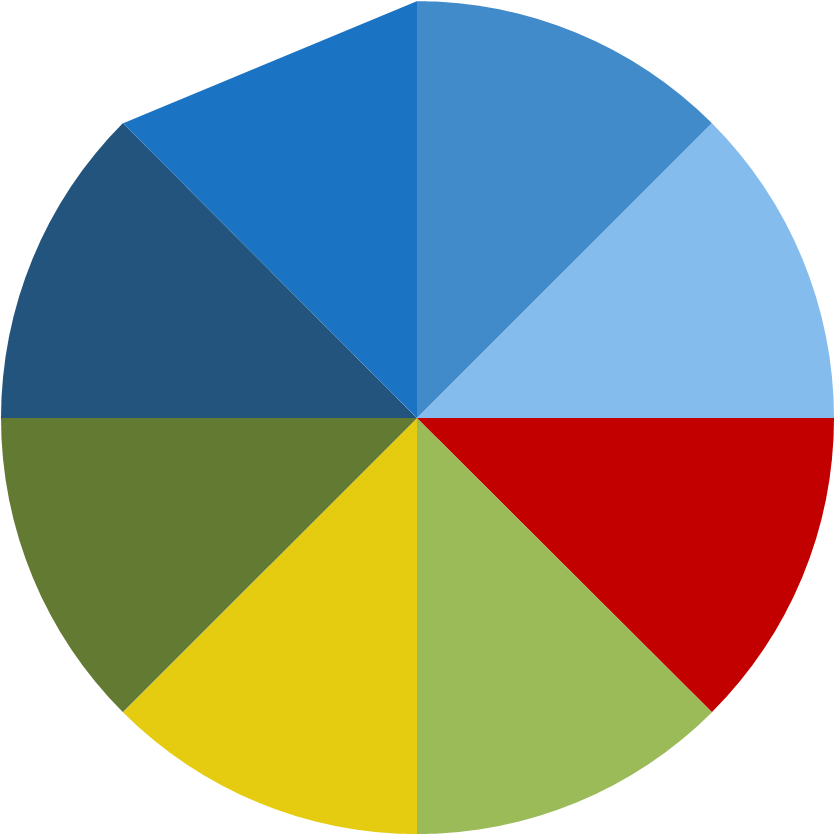
Now, you have a standard 2D pie chart, as shown below.
Step 2: Convert pie chart to a vector-based object via copy/paste method
What we want to do next is create eight equal pie slices. In addition, we can delete any text objects in the pie chart.
- Firstly, click inside the Edit data box and type over any existing numbers in column B, with a 1. After that, type 1 in the cells below until you have eight 1’s straight down.
- Secondly, click on the chart title and press Delete.
- Finally, click on the legend, and press Delete.
So, now we should have a bare pie chart with eight equal pieces, like below.
Remove border lines from pie chart
In our chart, we have white border lines. Sometimes, when we convert the chart to vector, it will treat the border lines as a separate object. Therefore, let’s minimize dealing with that while we have an active chart.
To remove the border lines from the chart, follow these steps:
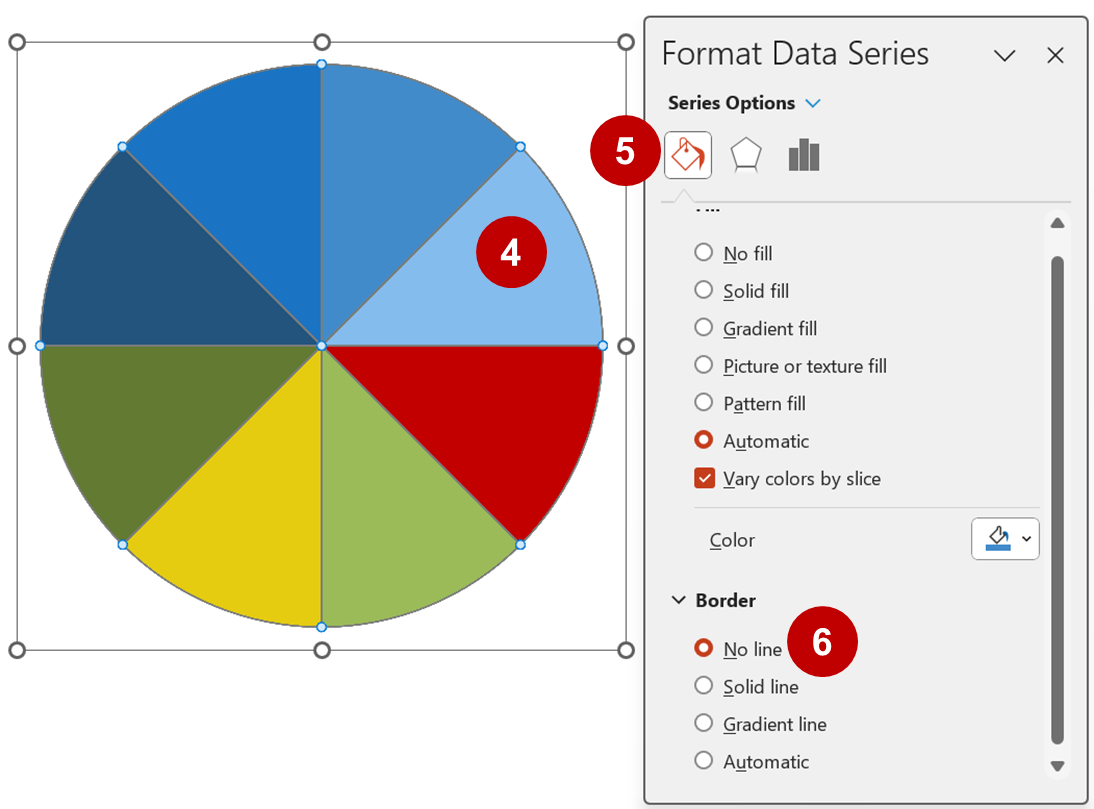
- Click on one of the pie chart slices, and press the keyboard shortcut Ctrl+1 (Control 1). This will open the Format Data Series box.
If you are having trouble with Ctrl+1, then you can also right-click on the chart, and select Format Data Series from the shortcut menu. Also, you can click on the chart and select Format from the menu. - In the Format Data Series box, click on the Fill & line icon, which should appear as a paint bucket.
- Under Border, select No line.
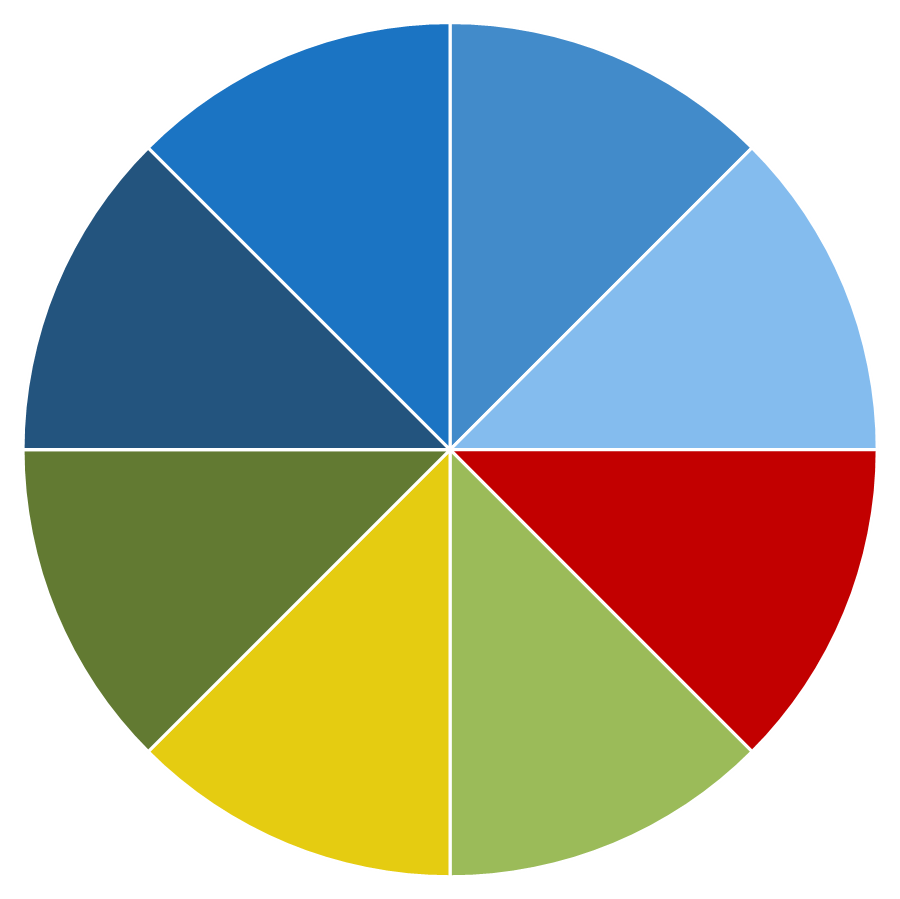
All the lines are gone!

Now, we can create the vector-based object for our triangles inside the octagon shape.
Create vector-based object using copy/paste method
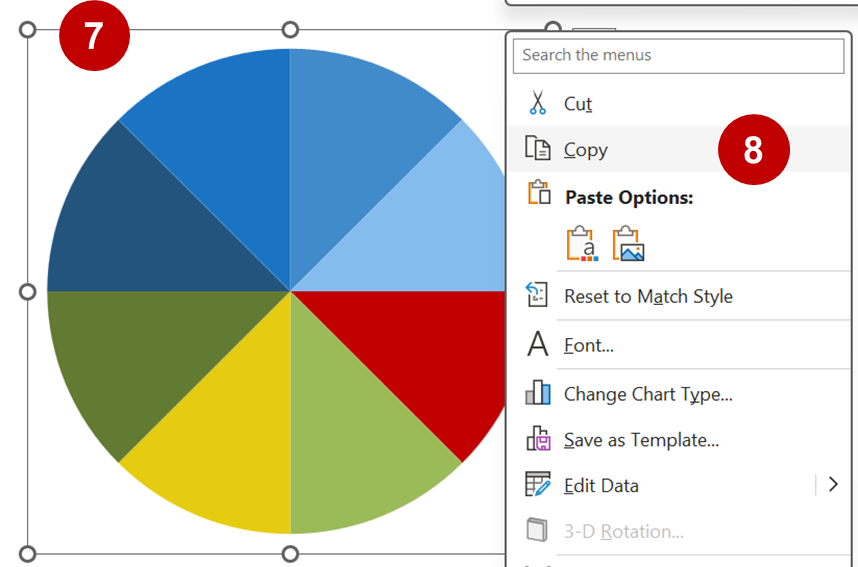
- Click on the entire chart object, not just the pie slices. Basically, you want to see white circular nodes around the chart, with nothing selected in the chart.
- Right-click on the selection border and select Copy from the shortcut menu. Note: You can also just select the object and press Ctrl+C from the keyboard.
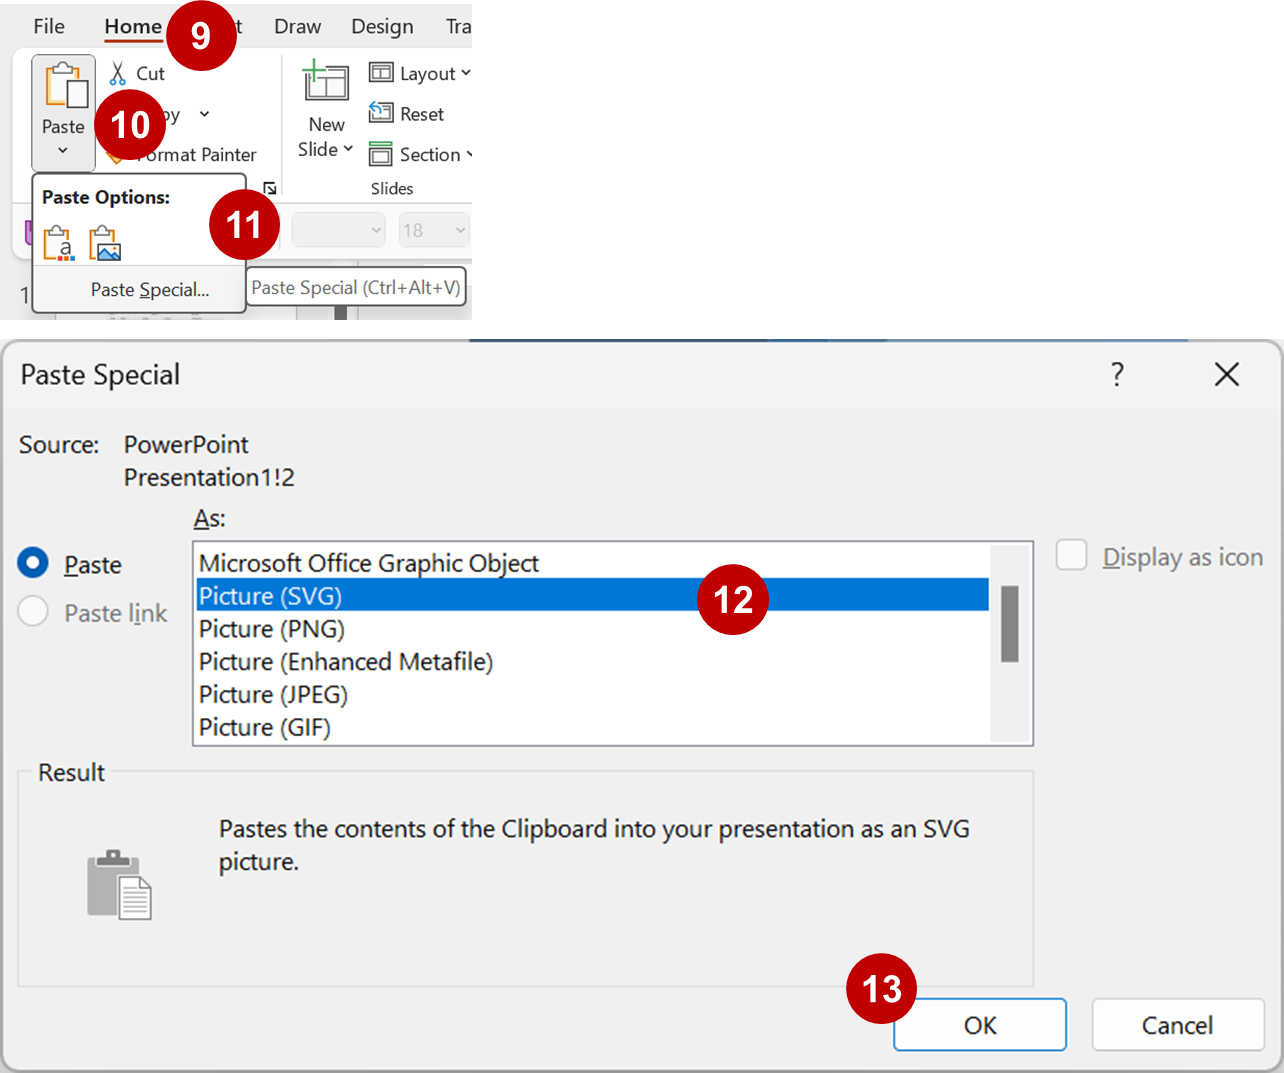
- From the menu, click Home.
- Under the Clipboard group, select Paste.
- Select Paste Special… from Paste Options. The Paste Special dialog box opens.
- In the Paste Special box, select Picture (SVG) or Picture (Enhanced Metafile) from the Paste list.
- Click OK.
Your pie chart is no longer a chart. It is now a vector-based object. We know, it looks like a chart. Now, we need to separate the pieces.
Step 3: Ungroup vector-based object into separate pieces
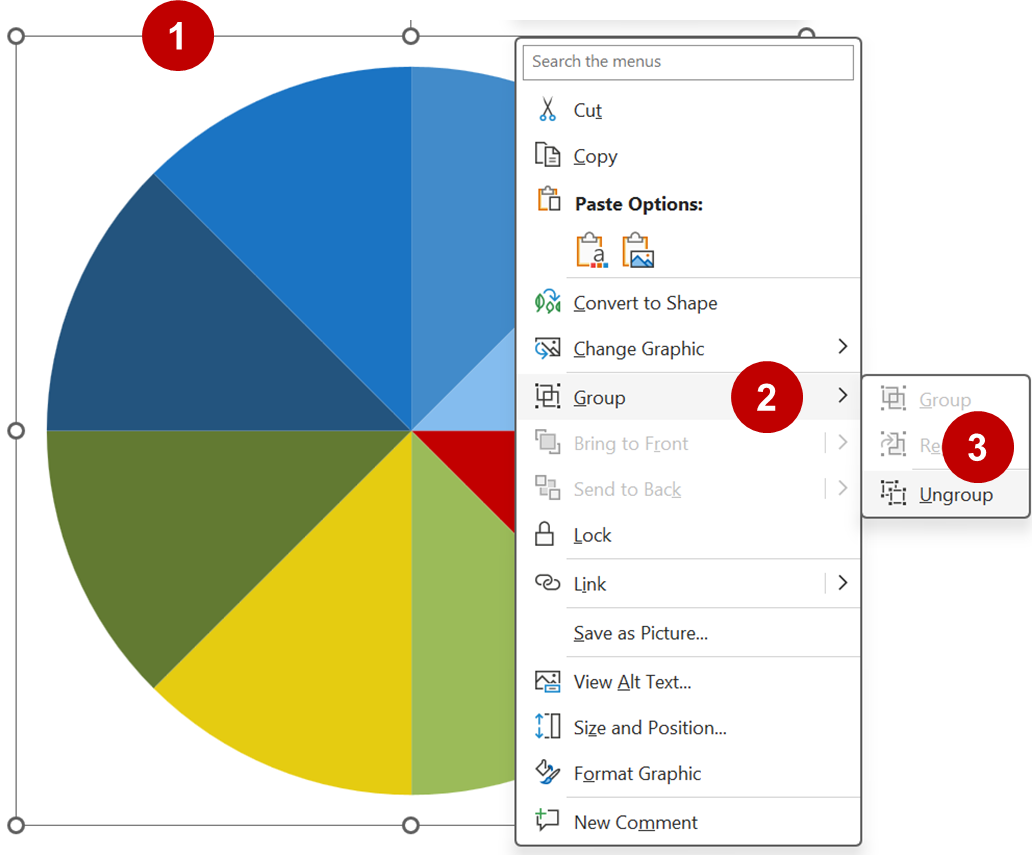
- Firstly, right-click on the chart. A shortcut menu appears.
- Under the shortcut menu, select Group.
- Finally, click Ungroup from the Group submenu. Note: Shift+Ctrl+G is the keyboard shortcut to ungroup an object in PowerPoint.
When you try to ungroup a vector-based image the first time, it displays a popup box. It prompts you if you want to convert the image to a PPT object. Just click Yes.

Repeat the steps 1 to 3 until you see that all the slices are ungrouped.
Once you ungroup completely, your object should contain selection nodes around every pie slice, as shown below.
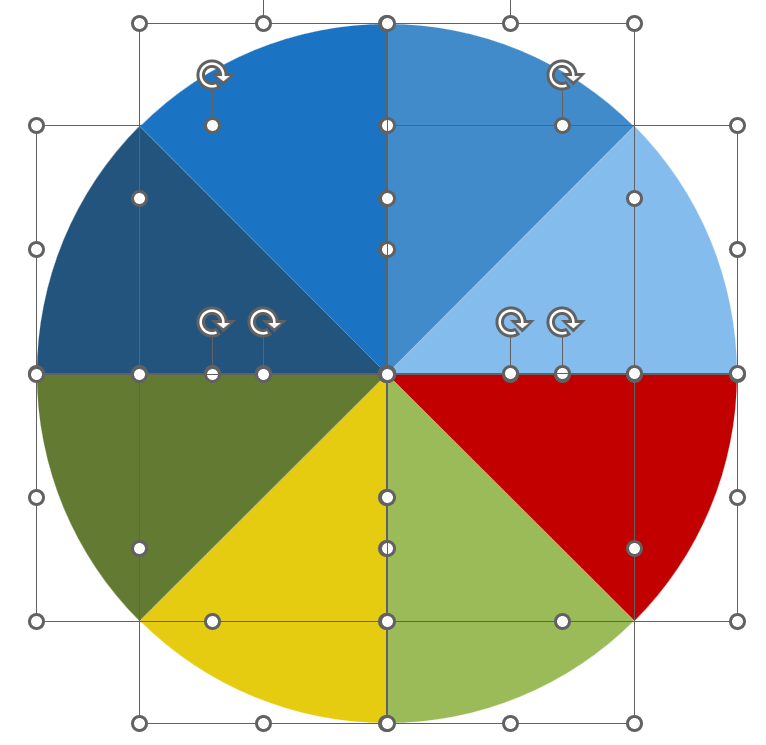
So, now that you can confirm separate objects, you can click outside the selection to deselect all the objects. This will allow us to work with each slice individually.
Step 4: Adjust rounded edges to straight edges
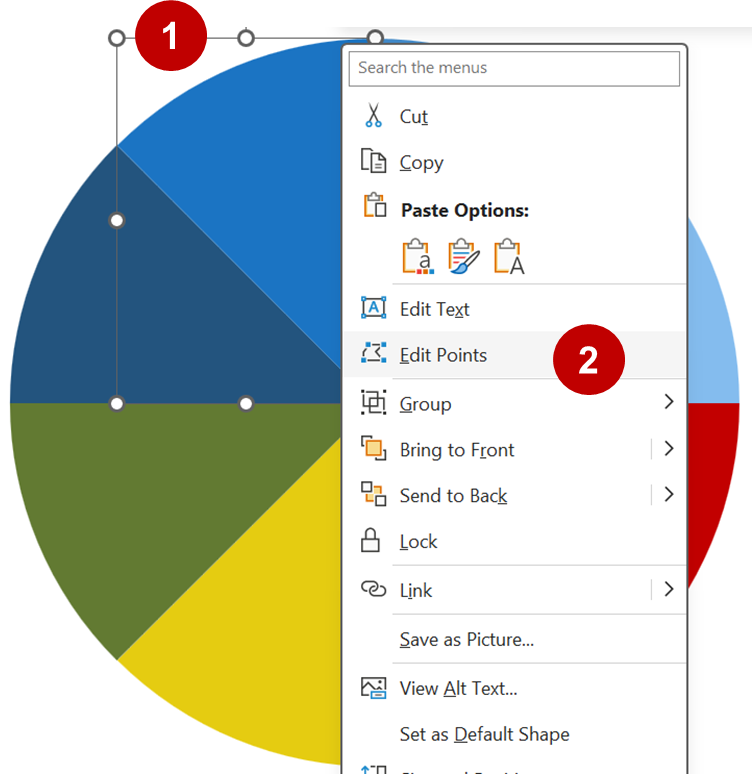
- Right-click on one of the slices.
- Under the shortcut menu, select Edit Points. This will transform the selection into edit point mode.

- Right-click on the rounded border.
- Click Straight Segment from the shortcut menu.
Your border should now be straight, like the image below.
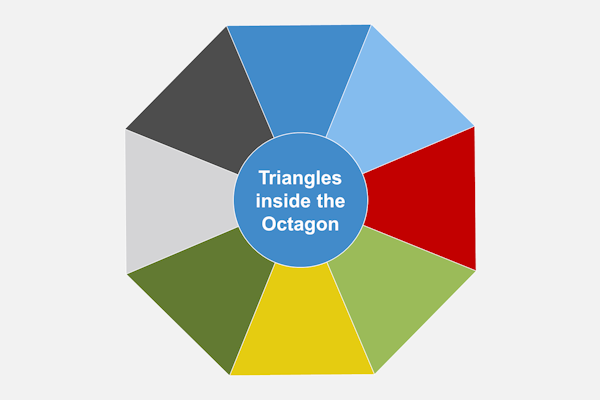
Now, repeat steps 3 and 4 seven more times to get the image below.

There you have it, triangles inside the octagon. It kind of looks like an umbrella, right? So, we can rotate the entire piece to make it look like an octagon we are used to seeing.
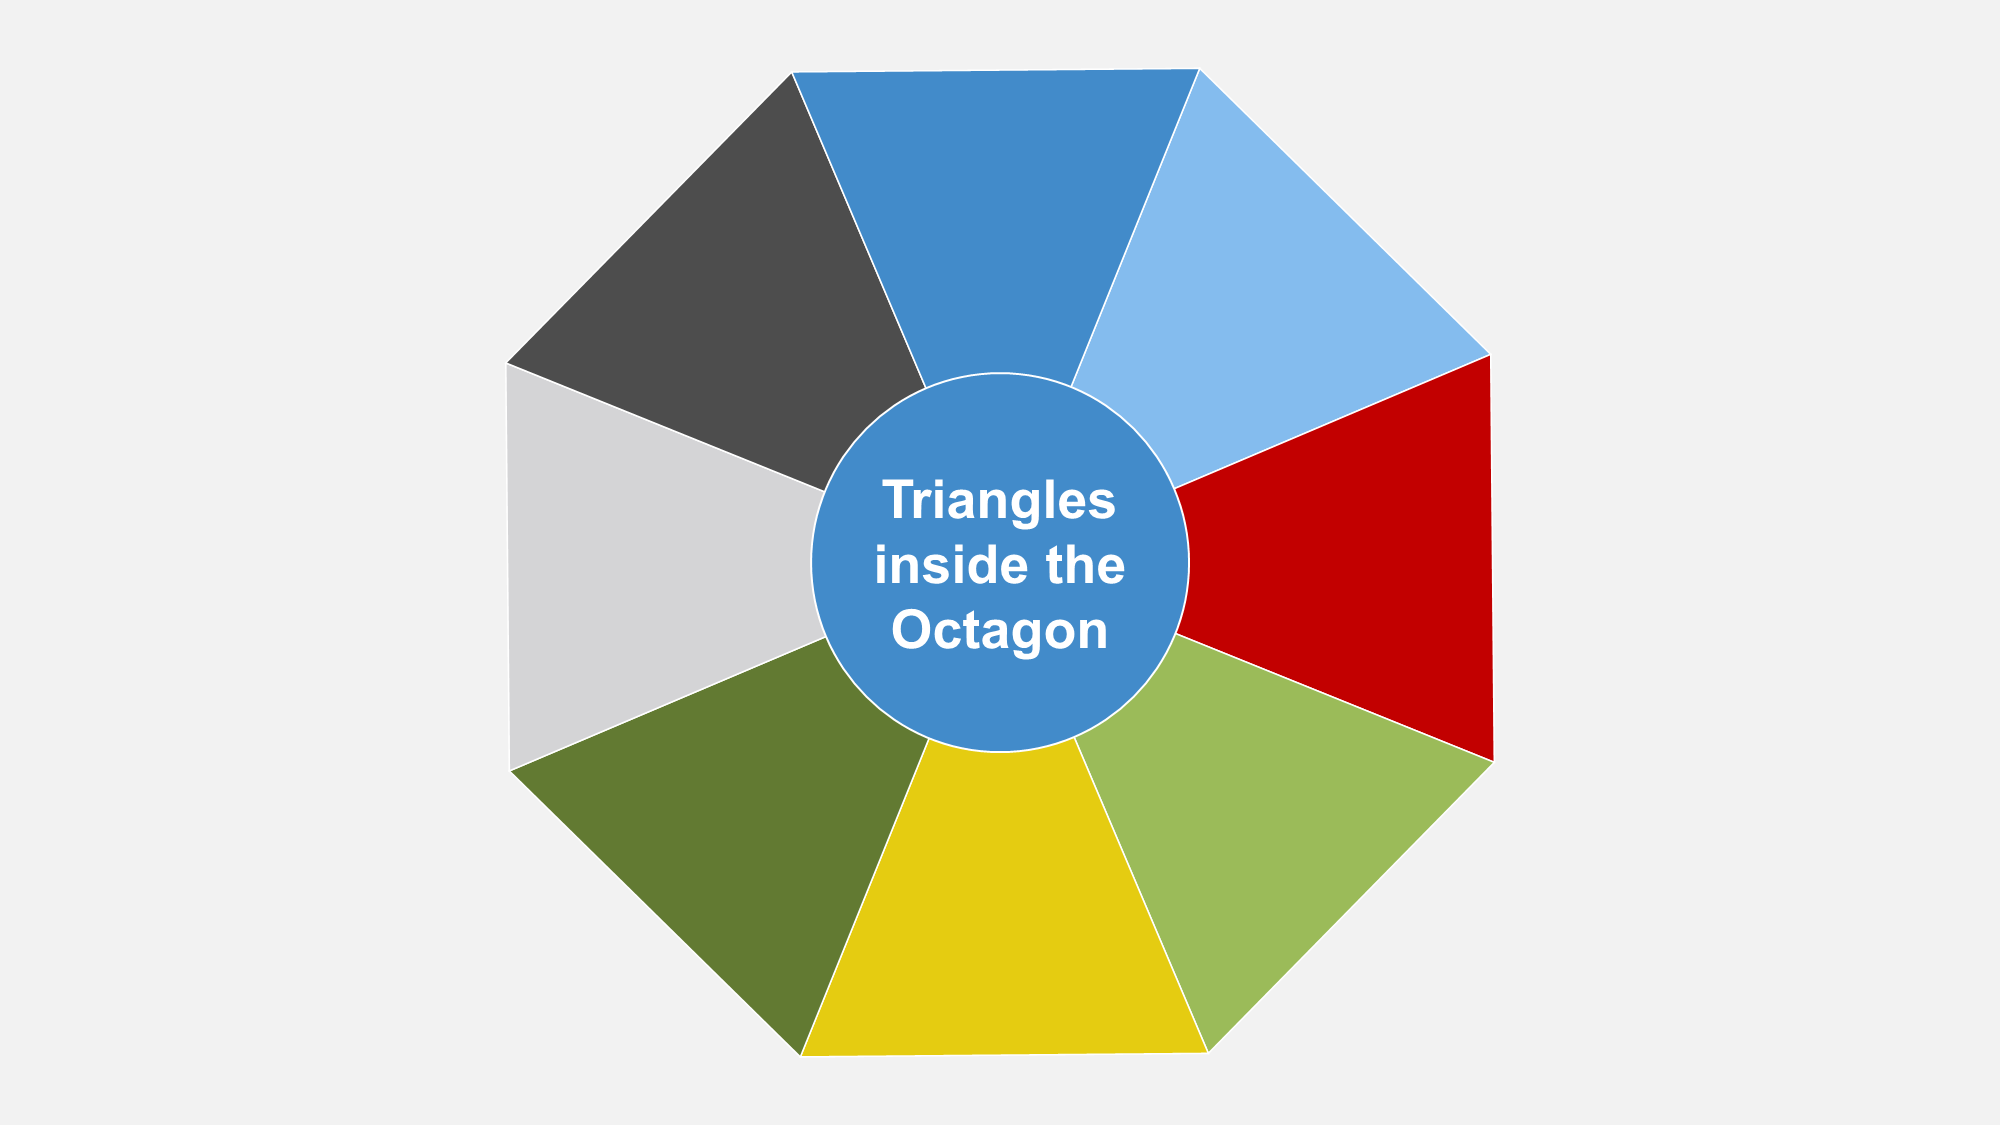
Rotated view

As you see, it looks more like the octagon you are probably used to seeing. We rotated the image about 22 degrees. Before you rotate, you should group all the pieces back together.
If you need additional help rotating objects in PowerPoint, then click on the link below.
Rotate or flip an object in PowerPoint
Success!
Were you successful? If not, then go back and give it another shot. Otherwise, send us an email at support@techronology.com. See what we can do to assist you.
Final words for triangles inside the octagon
Finally, we are done. We would like to thank you for viewing this tutorial. Hopefully, it will help you out with your design endeavors. Keep in mind, the method we showed you should work with hexagons and other types of shapes.
Related
Thank you and enjoy!