This quick tip shows you how to break apart a SVG image in PowerPoint (or PPT).
Note: For the purpose of this tutorial, we use PowerPoint 2007 or higher, on a Windows PC.
Brief overview
As mentioned above, this is a quick how to on breaking apart a SVG image. When we say break apart, we simply mean ungroup, or separate into individual pieces. Keep in mind, not all SVGs contain individual pieces.
Once you separate the image, you will be able to use the parts in the same manner as regular PPT shapes. Meaning, you will be able to apply color and special effects to all the pieces of the separated SVG.
Quickly create a SVG file
Perhaps, you should create a SVG image, so you can follow along with us. So, one of the easiest ways to do that is through our Donut Maker app. Create a donut shape and save it as an SVG file.
Once you get your SVG image, you are ready to get busy with us.
Steps to break apart a SVG image in PPT
Here are the steps to separate a SVG image in PPT.
Step 1: Bring SVG into PowerPoint
To bring the image into PowerPoint, you can Insert… Picture from the menu. Or, just drag it into PPT from File Explorer.
Step 2: Ungroup the SVG
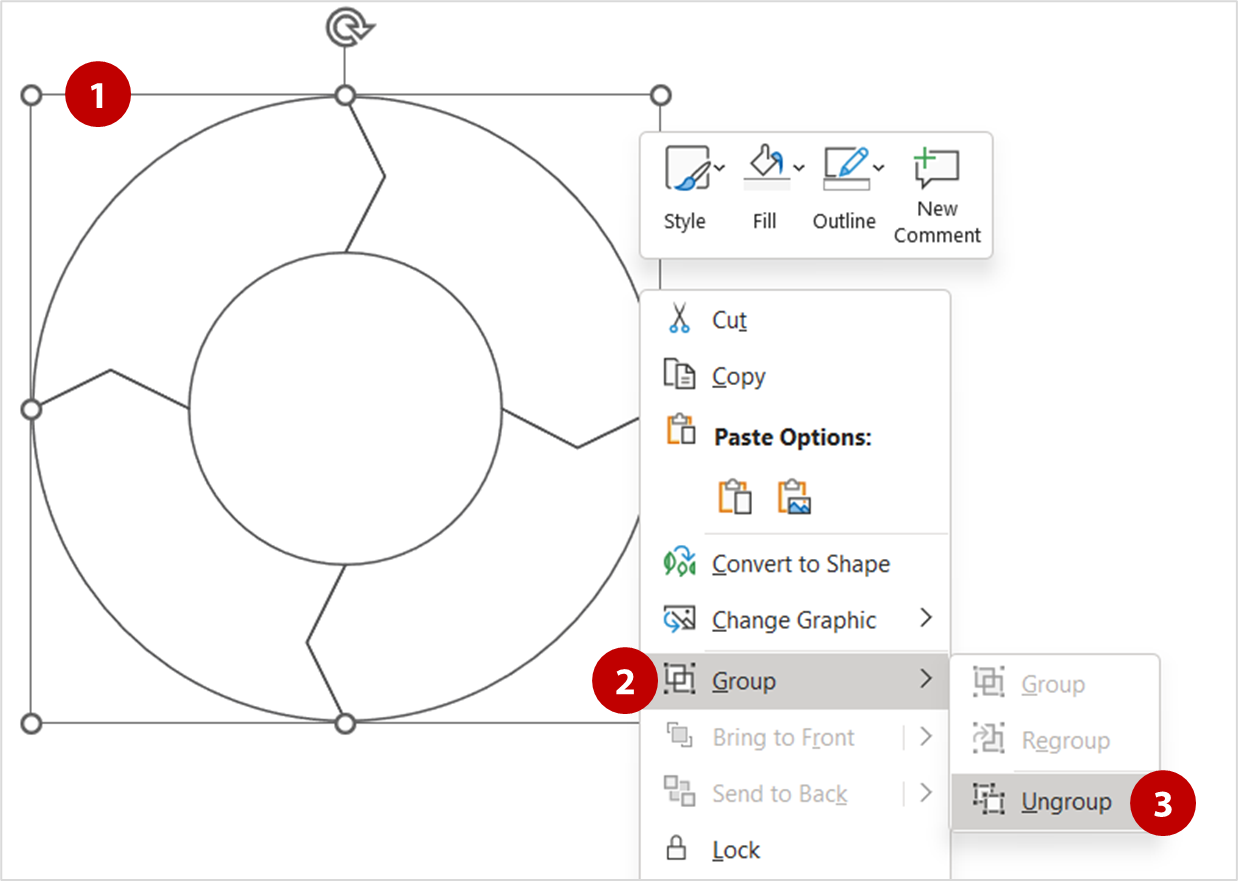
- Right-click on the SVG image. This will display the shortcut menu.
- From the shortcut menu, select Group. A submenu will appear.
- Within the submenu, select Ungroup.
As a result, you are asked to convert your SVG into a PPT object.
Shortcut alert: In Windows, press Ctrl + G to group, and Ctrl + Shift + G to ungroup.
Step 3: Convert SVG to a drawing object
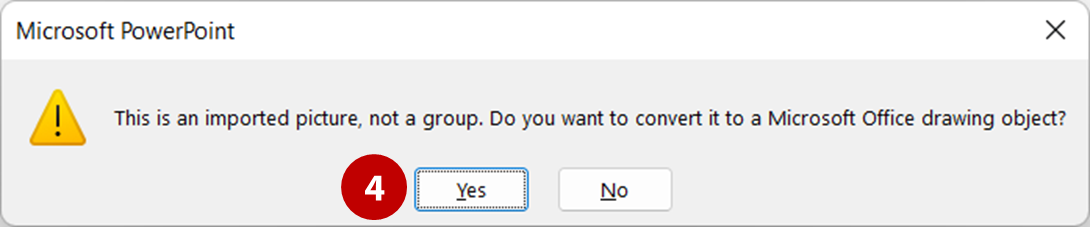
- Finally, click Yes to convert your SVG into a PPT object.
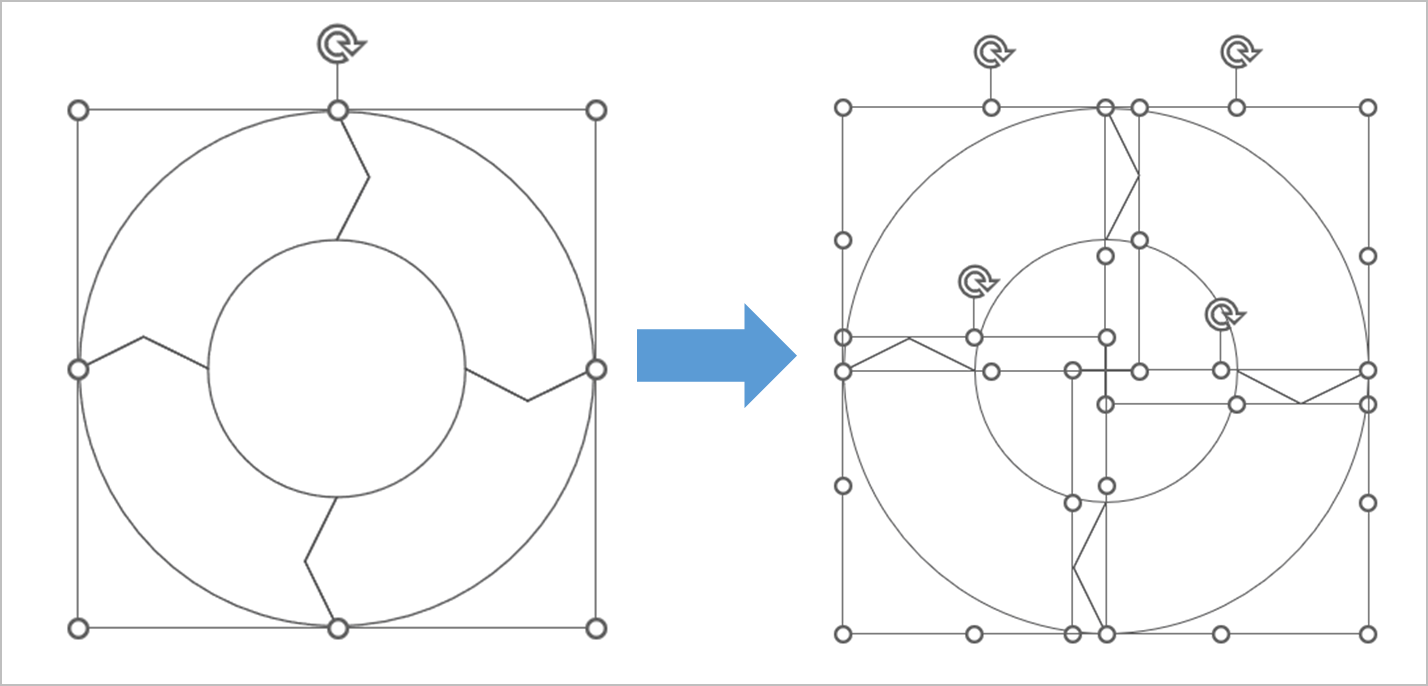
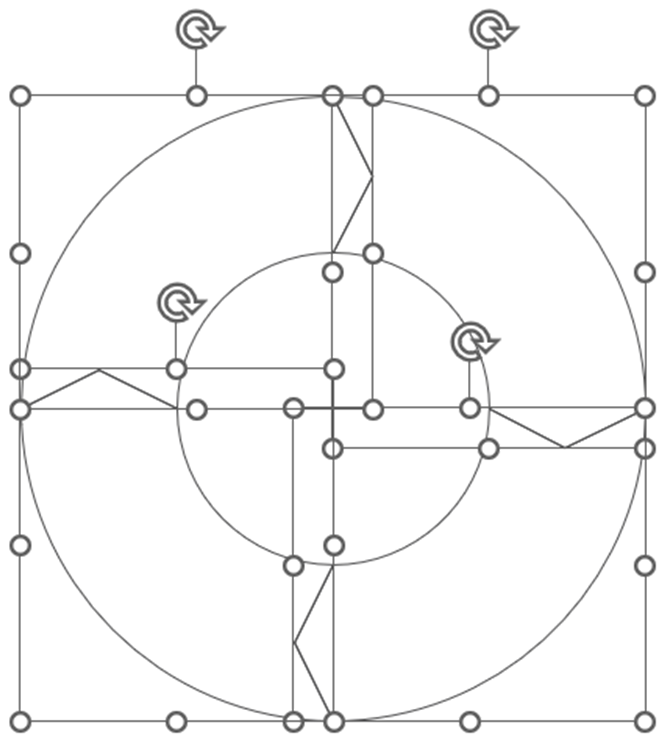
After that, you will see your SVG broken apart, similar to the image below.
From here, you should be able to move and format each piece individually. In some cases, you may need to ungroup your SVG twice. Otherwise, you are good-to-go.
Success!
So, were you able to complete the task? If not, then give it another shot.
Related
- Bring SVG image into PowerPoint
- Convert object to image in PPT
- Learn about the Donut Maker
- PowerPoint lessons
- Resize object in PowerPoint