Steps to save SVG file to PNG in PowerPoint
Follow the steps below to save SVG file to PNG format in PowerPoint.
If you already have the SVG in PowerPoint, then skip steps 1 to 5.

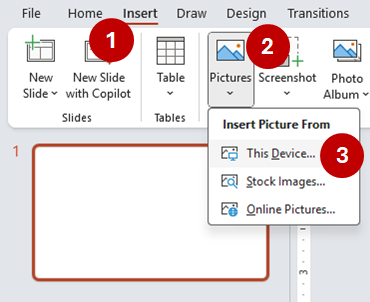
- Firstly, click Insert from the menu bar.
Note: Make sure you have a document open, or start a new file. - Under the Images group, select Pictures. A drop-down menu opens.
- From the drop-down menu, select This Device. This opens the Insert Picture dialog box.

- In the Insert Picture dialog box, navigate to the location of your SVG file, and select it.
- Click Insert button to place it in PowerPoint.
As a result, your SVG should now bein PowerPoint.

Next, let us save this SVG file to PNG format.

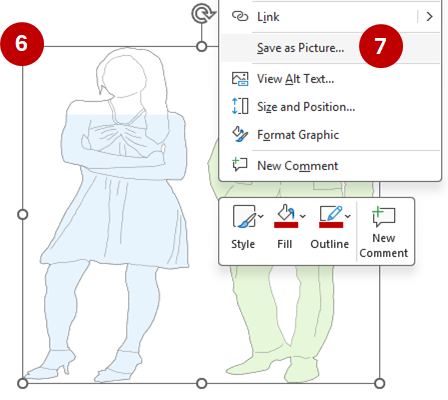
- With your mouse, right-click on your SVG image. This will display a shortcut menu.
Note: You can also click on the image and press Windows keyboard shortcut Shift + F10. - From the shortcut menu select Save as Picture… The Save As Picture dialog box appears.

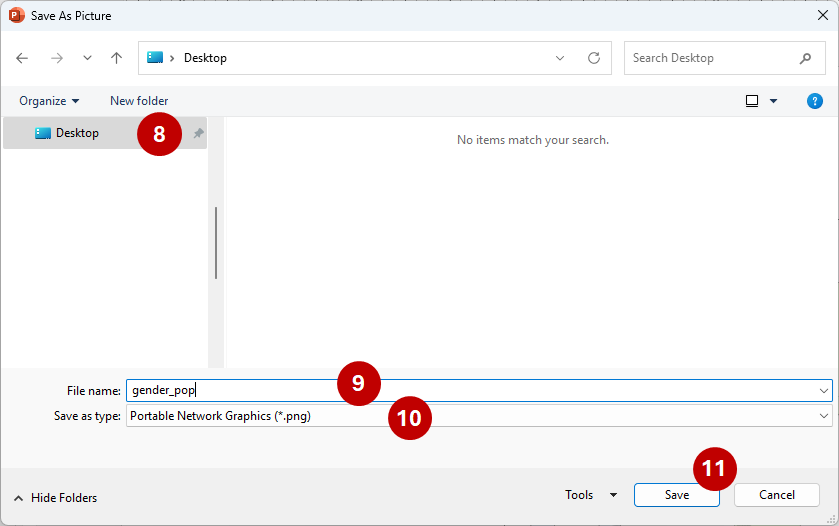
- Navigate to the directory where you want to save your PNG.
- Enter a file name.
- For file type, select Portable Network Graphics (*.png).
- Finally, click Save.
So, that is it; your PNG file is now saved. In like manner, open your PNG file, see if it works for you.

Overall, your PNG file should maintain the same transparency as your SVG image.
Success!
So, where you successful? If not, then give it another shot.
Online alternatives
Fortunately, if you do not have PowerPoint, there are online tools to help you accomplish the same task.
Thus, you may want to try this online tool:
SVG to PNG – Convert SVG files to PNG Online
Note: We did not test any online tools to convert SVG to PNG.